Table of Contents
Read the (better) PDF version of this blog here!
So, this is going to be more of a summary and some implementation details of my first ever experience with computer graphics and making games.
You can find the itch-io page with all the instructions and links to download and play the game (maybe even give me a follow)
Two weeks ago, not knowing anything about computer graphics and game development, I embarked on a journey down the rabbit hole of creating one of the pioneering games of video game history, such as the OG Doom and Wolfenstein 3D.
I decided to create a raycasting engine in C++ using the Simple DirectMedia Layer graphics library. And for a beginner like me, it was quite the challenge.
The whole idea of making this in a very bare-bones library and language like SDL2 and C++ was because I wanted to create something that would be truly cross-platform from the start. And by cross-platform I mean cross-platform. The game would run on all desktop operating systems (Linux, Windows, Apple) and all mobile operating systems (Android, iOS, Raspberry Pi, Chrome)! And of course the PSP. I could talk a lot about why the PSP, but I’ll save that for another time.
Introduction
Now you must be asking - “Bruh, what even is a Raycaster”.
The simplest way to explain it is that it’s a rendering technique to create a 3D perspective from a 2D map, what we like to call as 2.5D.
Although this is about the making of a raycasting game engine, I had to give a lot of thought on how game engines are structured in the first place.
I wanted my project to follow the Object-Oriented design pattern as well so that it would be easy to extend and plug in components without touching a lot of code, enabling a deeper level of abstraction. I taught me a lot about inheritance and composition in C++.
The Game Engine
I’ll talk about the game architecture in this section.
The engine was written in C++ and then compiled using the CMake build system, which enables me to go completely cross-platform.
The high level architecture of the engine looks something like:
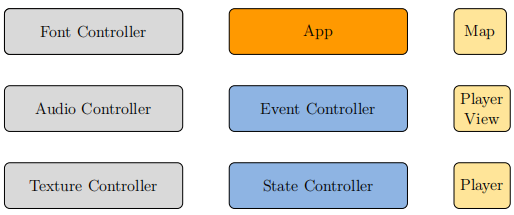
I would’ve gone more into the design but TikZ is such a huge pain to learn. Though, I might come back to this in the future.
Raycasting
What actually distinguishes my project from any other implementation that you may find on the web is the fact that instead of dividing the whole world into square grids, it defines all the objects and texture rendering using their actual coordinates.
Looking back, using the 2D grid approach while being a lot easier to implement, it’s also quite a bit more efficient and accurate.
Having said that, it also restricts a lot of what can be actually created in the game.
The biggest leap of faith I took for this engine was to create the raycasting logic. So, here’s how raycasting actually works.
We first need to define these terms:
-
Player direction : The direction that the player is currently facing.
-
Maximum view distance : The position of the player in the world.
-
Horizontal field of view : The visible field of view the player sees in the horizontal direction. I assumed this to be, 100°.
-
Vertical field of view : This gives an idea of how high or low can the person see. I assume this to be, 60°.
-
Number of rays : This is the number of rays that we cast from the player’s position. You can set this number a lot of ways, and how high you set this will determine how accurate the raycasting will be.
Now we are ready to tackle the actual casting of rays. What our aim is to cast a ray from the player’s position in the direction of the player’s direction and then check if it intersects with any of the walls in the map. If it does, then we need to calculate the distance between the player and the wall and then draw a slice of the player’s view corresponding to that ray.
So, consider this diagram of the player’s situation:
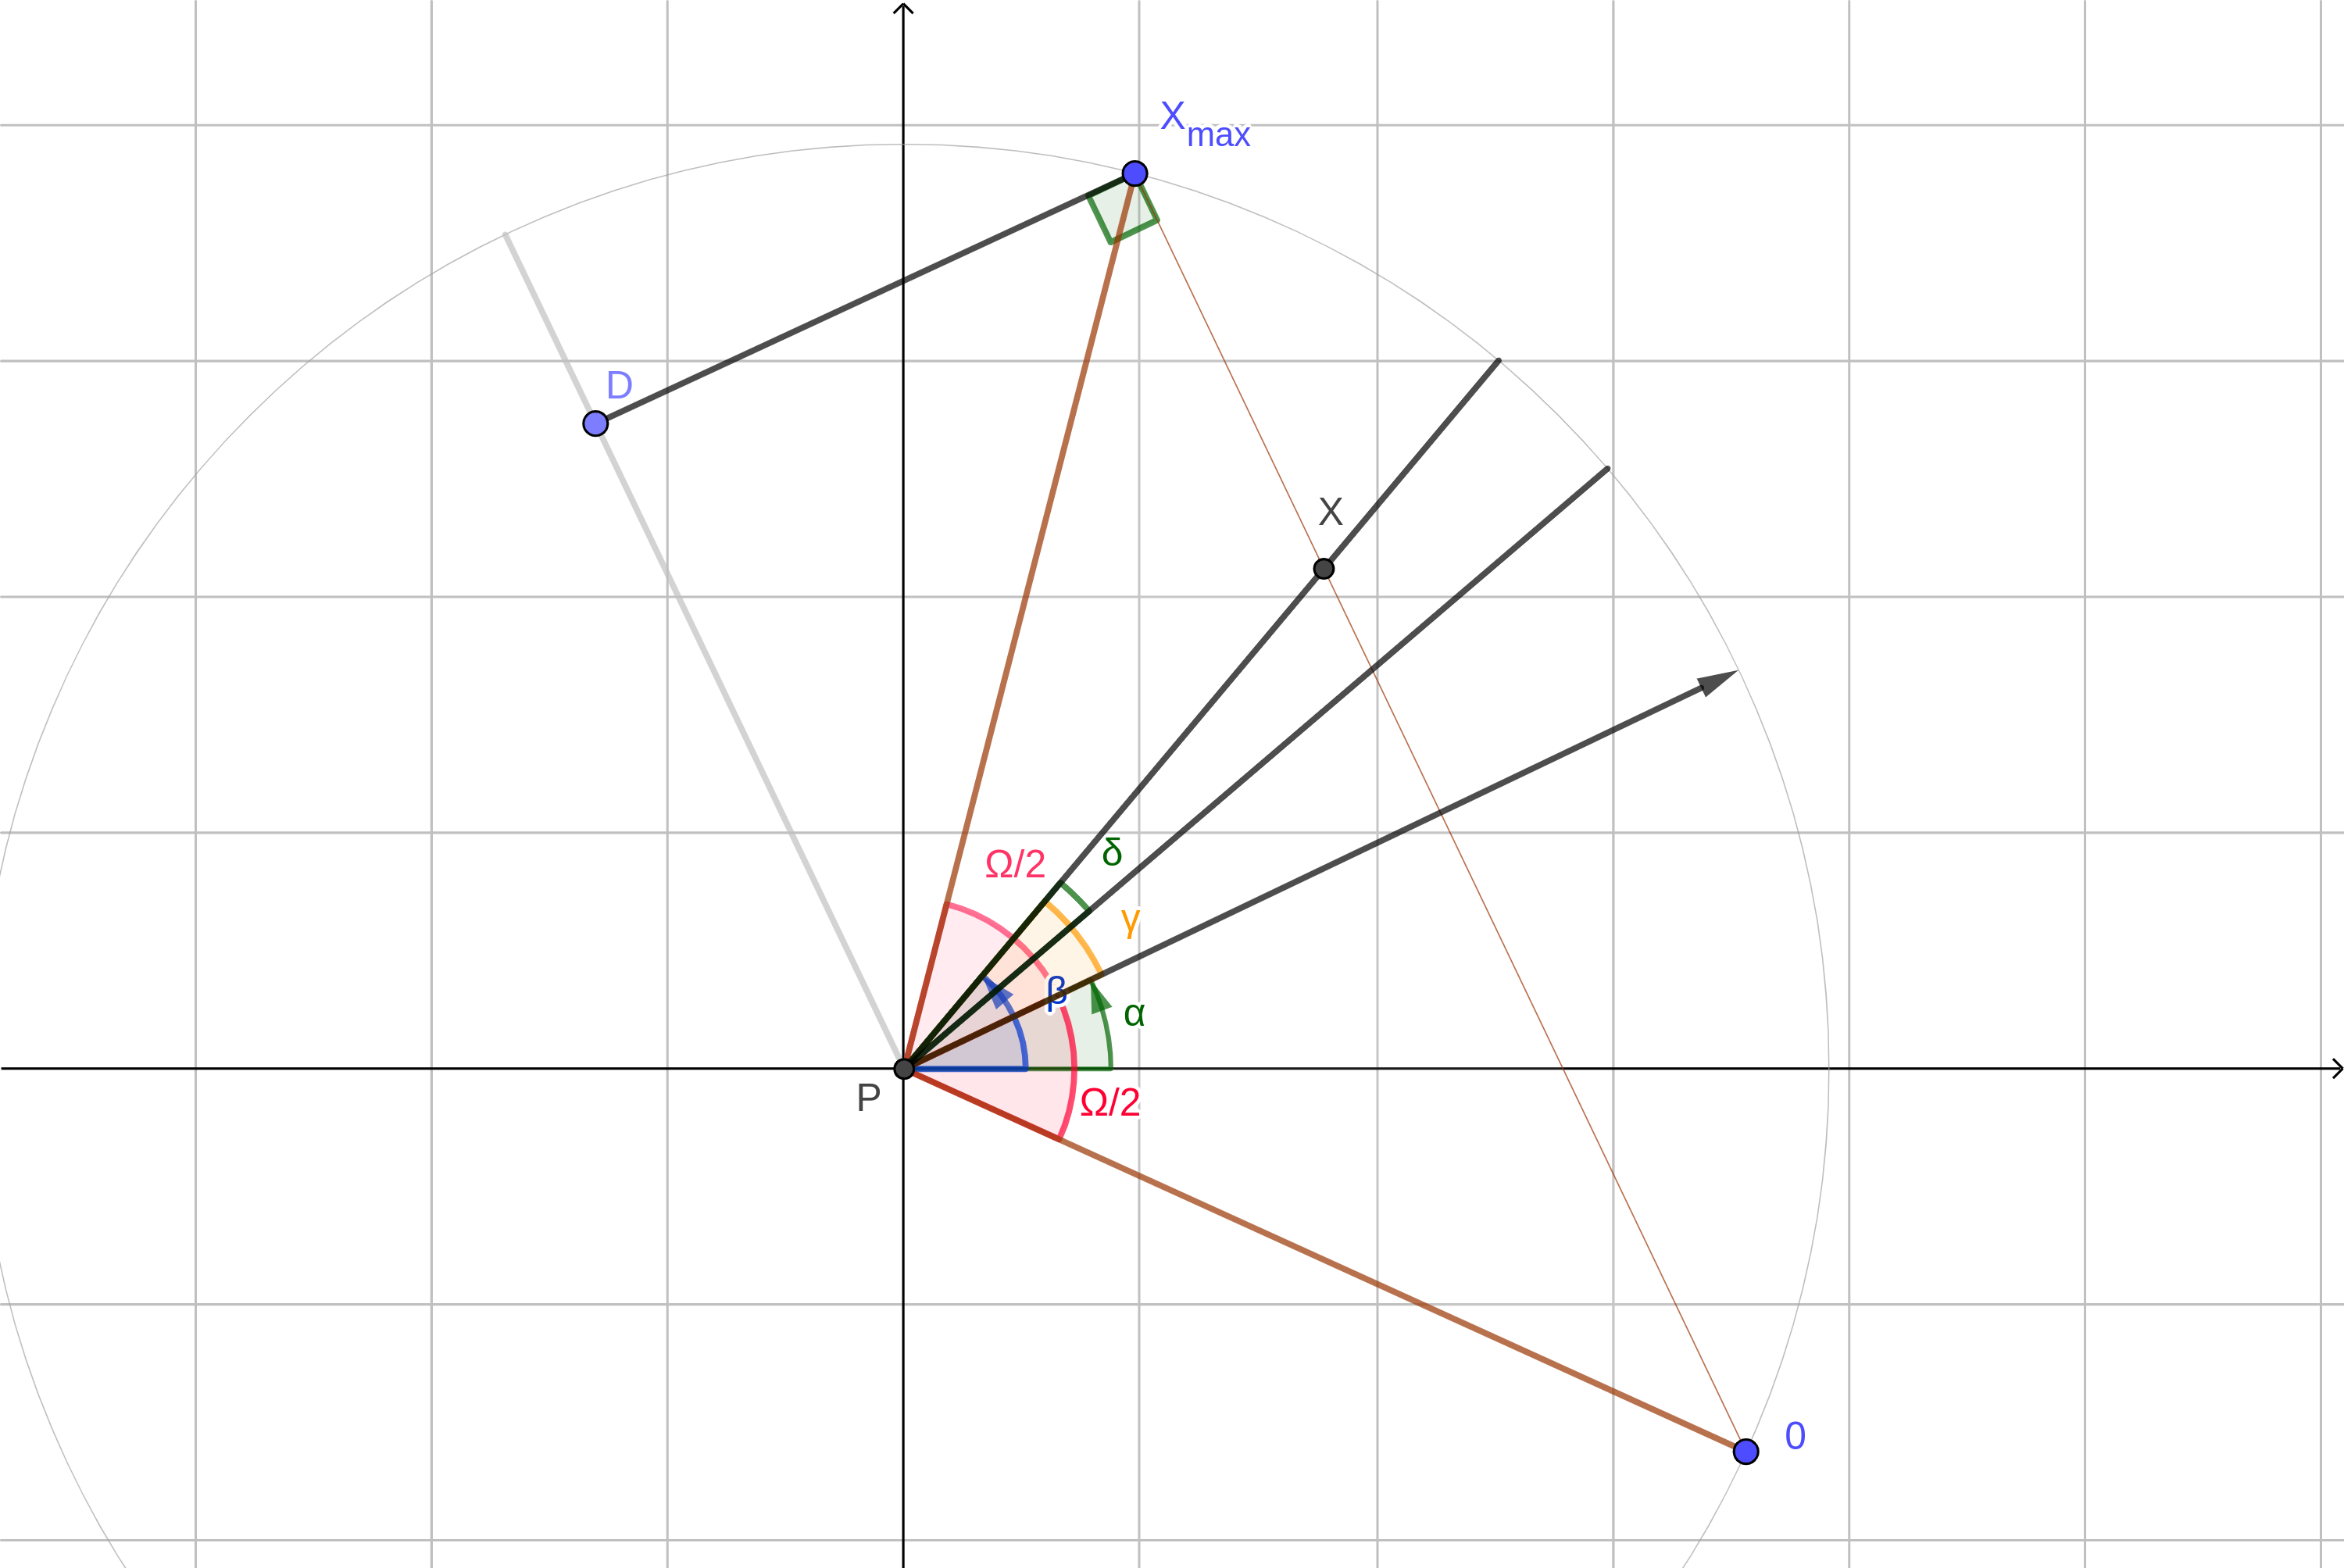
This circle corresponds to the player’s maximum view distance ().
It should be noted that half of the cast rays would be on the left side of the player’s field of view () and the other half would be on the right side.
Now, we can define the angle between each ray as:
We are going to construct the view of the player by drawing a slice of the view for each ray. The rays would be equally spaced (suspending the angle at the player) starting from point till
We’ll calculate (distance taken from ) by using the following formula:
So, the distance for any ray at angle would be:
Now, we can calculate the width of the slice () for each ray as:
But, we cannot calculate the vertical height of the slice by using the distance of the ray’s end point from the player directly.
This is the exact cause of the fish eye effect that you might have seen from some cameras that looks very alien to your eyes. It looks something like
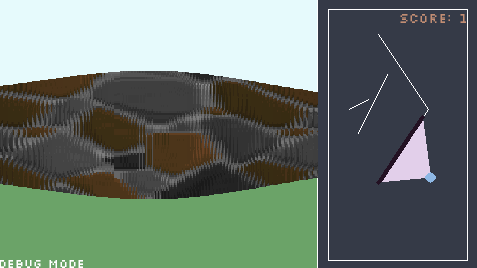
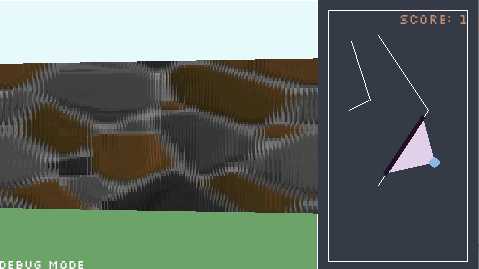
We can correct for the fish eye effect by taking the length of the ray from the plane of the camera.
Thus, we calculate the height of the slice based on this:
Nice! The fish-eye effect is no more.
Phew! That was a lot of math. But, we are almost done.
Another thing that we can calculate is the brightness of an individual slice:
This means that farther objects will appear darker than when they’re closer. You could probably play around here and find a way to do fog or mist, but I’ll leave that up to you.
The last thing left for us to do (at least on this blog) is to figure out a way to map the image textures onto the actual walls.
-
The method is pretty simple,
-
The width and height of the textures remain the same.
-
The start of the texture can be calculated by taking into account the distance of the ray along the line.
-
The remainder operator will repeat the texture when the length of the wall is greater than the texture itself.
Conclusion
That’s it, Congrats, you made it to the end. Raycasting works, and you’re now a game developer.
I hope you enjoyed the journey with me as much as I did making and writing this. Maybe you’ll even feel inclined to contribute and fix the inevitably many bugs I have in my code.
Thank you for reading Kueeing1.
References
-
king + queen let’s make this go mainstream ↩
